Sunday, September 29, 2013

My beaded paisley tutorial...

In 2009, I was asked to write a tutorial about my beaded paisleys. I did this for a site called Stitchinfingers. I wanted to repost it here on my blog, as it's a pretty good tutorial if I do say so myself. I was surprised to see the tutorial has gotten nearly 5,000 views on Stitchinfingers. I also contributed the tutorial to an online crazy quilting magazine called CQMagonline. The magazine is no longer being published, but if you do a search you can probably find it there as well.

(Note: I reference reverse chain stitch in the tutorial. Click the link for a video.)


Supplies needed:
Paisley pattern
4-5 inch square of heavy fabric - velvet, velveteen or other thick fabric works well
Stitch witchery, wonder under or heat-n-bond webbing or fusible interfacing
Perle cotton size 5 or 8, rayon and silk embroidery threads in complimentary colors
Variety of seed and bugle beads to compliment your fabric
Center focal bead or silk ribbon that compliments your fabric
Beading thread
Glue

Construction time: About 8 hours depending on the level of detail and complexity of stitches.

Directions:
Apply fusible webbing or fusible interfacing to the back of your fabric. A heavy fabric provides a good base for building the paisley, and the webbing will help keep your fabric from unravelling. Some fabric color will show around your beading and stitchwork, but not much. Velvets and velveteens make a paisley look richer.

Print out the paisley patterns in appropriate sizes. Cut out a paisley.


You can trace the paper paisley onto card stock or the side of an empty tissue or cereal box and cut out for a more stable pattern. The large paisley shown in the construction photos is approximately 3" long.


Trace the paisley pattern onto the front of the fabric. Remove web backing, if appropriate.


Choose a variety of threads, seed beads and accent beads for your paisley in complementary colors. You won't use everything you bring out, but with a selection you will be able to pick and choose what looks best. If you know how to tat or have some tatted pieces available, those work well for a central focal point. Other centers can be made with silk ribbon embroidery, a small stitched motif or an ornate bead. Decorative buttons might also work, but if the button has a shank you will have to make a small hole in the fabric so the shank will drop below the surface. Otherwise, your button will be wobbly and sit on top of the fabric. You could also try a piece of felt under the button if you didn't want to make a hole.


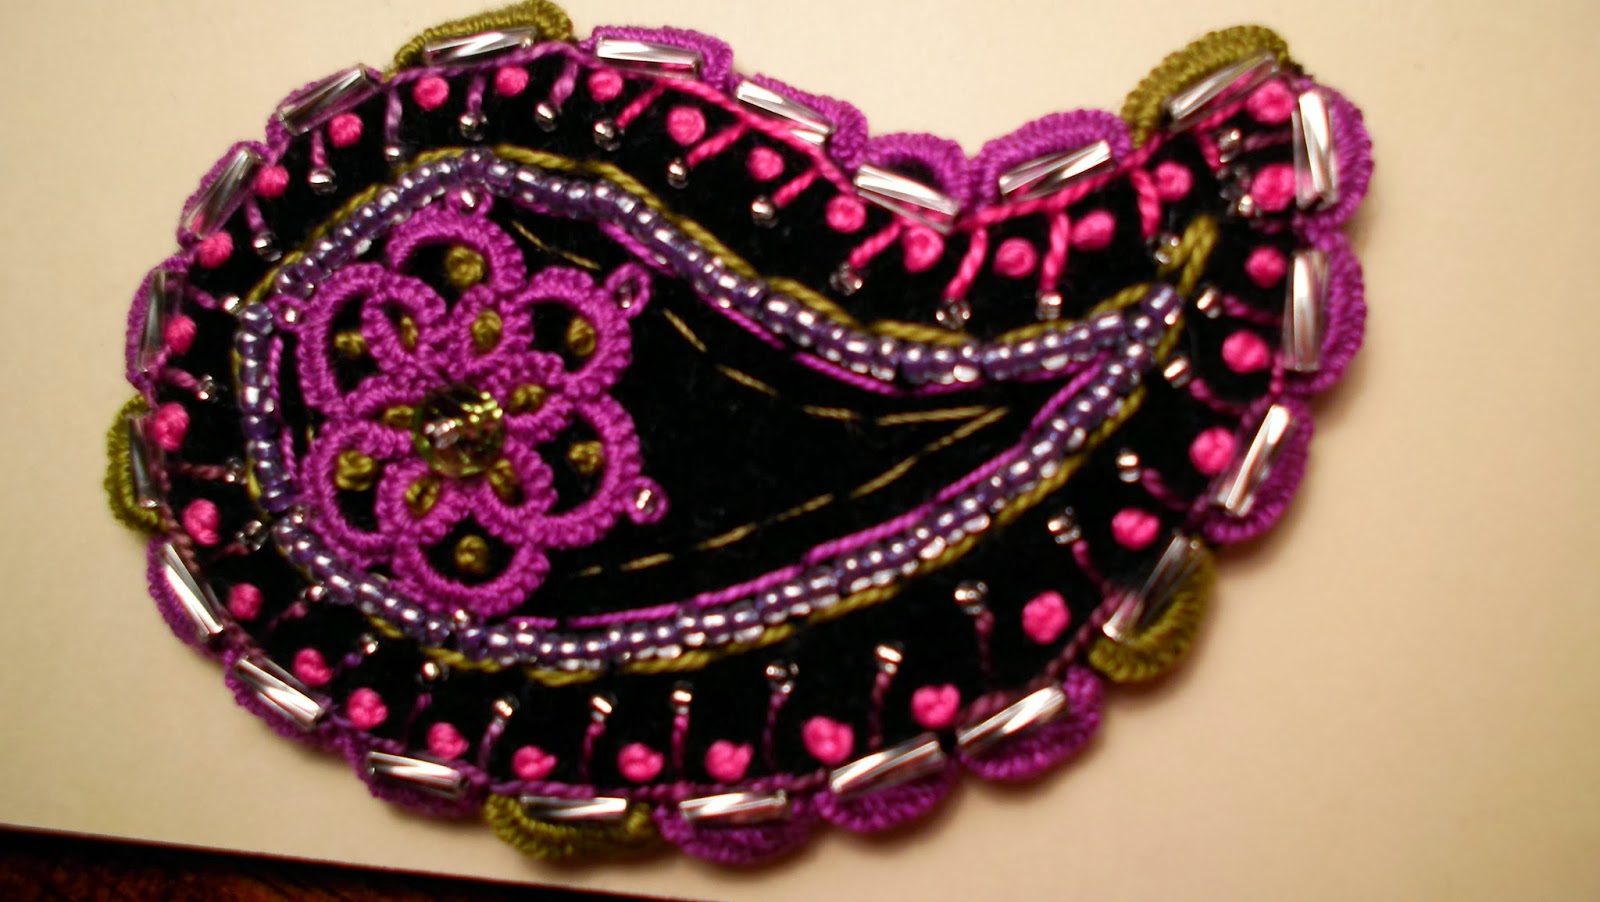
Stitch the border line of your paisley using reverse chain stitch or heavy chain/braid stitch. A medium weight perle cotton works well in size 5 or 8. This edge stitching creates a firm frame for your paisley. I think I used a thick silk fiber thread for this outline


Here's where you will alternate beads and stitching. Add a line of seed or other beads inside the chain stitching. Then add a line of backstitching. Rayons and silks work well for the embroidery, as they add a nice sheen and stand out from the fabric.


Continue adding thread and beads as space allows. A 2" long paisley will hold 3 to 6 rows of stitching and beads, depending on what is intended for the center. The constructed paisley shown has a total of 6 inner rows of beading and stitching when finished.


Tip: Keep your threads tidy on the paisley's back to keep the fusible webbing exposed and to minimize bulk.


You should have by now decided what you wish to place in the center of your paisley. A large bead or bead cap works well. A flat button or SRE works well, too. A center of silk ribbon roses in descending order (a spiderweb rose followed by graduated French knots) can be seen below.


Once your center is completed, cut out your paisley using sharp scissors. Cut carefully around the outside line of stitching and avoid clipping any of your edging stitches or your outline stitching will unravel. Carefully trim off any excess fabric.


Here is the finished paisley. I made this one for my husband to adorn his tan messenger bag. I think it will look nice. I chose more "manly" colors, since it was for him, including making a center thistle instead of a frilly flower. He loves it, so I'm happy.


If you have used fusible webbing you should be able to largely fuse your paisley onto fabric and hand stitch around the edge to secure it. Otherwise, stitch or glue your paisley wherever desired. You can also attach a clip on the back and use it as a hair clip.

Here are some other paisleys I've done. 

This is a nice one. Very ornate. I did the tatted flower in the center. The outside edge is done in cast-on stitch and bugle beads. Lots of colonial knots, too.


This pretty paisley went on a CQ round robin block several years ago. The center is filled with silk ribbon French knot roses. I got to show CQ guru Judith Baker Montano how to make these lovelies during one of her workshops, so that was a little thrill.

 I made this for my stitcher friend, Lorna, who lives in England. Check her out on Facebook at Artymess Textile Art.


This has always been one of my favorites. That variegated thread is Sassa Lynn, one of my favorite brands of embroidery thread.


This one always reminds me of blueberries for some reason. In a lot of these I used buttonhole stitch for my first outlining stitch. Then I went back and added beads and bullion stitches to the outside edge for a nice scallop look finish. The inside flowers are also bullion stitch.


Fresh water pearls look really nice on these.


I hope you enjoyed the tutorial and find it useful. Feel free to comment and add links so we can see your finished paisley.

Thursday, September 26, 2013

My, how time flies...

Wow, after arm wrestling Blogger for the past couple of hours I'm feeling fairly worn out. I know it should be easy and probably is to many, but learning how to navigate unfamiliar software is always a challenge for me. Still, I was able to change my template, post a new header photo and convert to google+, although I'm really not sure I see any difference from the old version. But overall I think it looks better.

Anyway, I was startled to see it's been nearly a year since my last blog post, although that's not too odd for me. I always seem to run out of steam after starting a new blog. I was also extremely busy from October 2012 to March 2013 getting ready for a belly dance performance, so that is my main excuse for getting off track. I thought several times about posting costume progress, but you really have to keep that stuff under wraps so the reveal at the show is a surprise (and so nobody rips off your ideas - haha.) Our costumes did turn out fabulously, and I will share mine in a blog soon.

For the moment I am really excited about an antique crazy quilt I found at an estate sale here in town last week. Although the previous owner lives in D.C., she's pretty sure she bought this quilt locally. She had thrown it over her couch in her house here for a long time, then put it away when it started getting worn out. I didn't really look closely at the crazy quilt when I bought it. I just snatched it up when I saw what it was and that the price tag read $25. Yeah, you can't beat that for a little textile history.


When I bought it we were in the middle of a local bluegrass festival, so it got tucked away until I could spread it out on the floor and pour over its details. The quilt is actually in worse shape than I thought. Many of the pieces are worn away and come apart with too much pressure. I had thought about trying to repair it, but it's beyond my time limits. Instead, I think I will stabilize the back and hang it on a wall as-is. Still, it's a beautiful example of an antique crazy quilt. The pattern is a star in the center surrounded by blocks that make a hexagon. I'll bet this was gorgeous when it was newly completed. One nice detail is the pattern has been feather stitched in silk on the back.


That's a nice touch and I don't think I've seen that done before. As you can see, there are many names written on the back. The handwriting is in a lovely cursive, obviously done by someone with excellent penmanship. It's not easy to write on fabric and make it look nice, but she did it. I'm guessing the same person wrote all the names. At first I thought the names were probably those of the people who made the quilt. Then I noticed Mr. and Mrs. and Dr. titles on the names so I'm guessing this is probably a memorial quilt. Unfortunately, it doesn't look like anyone thought to put the date when it was made or where it lived. What a shame.

Still, I love the rustic, weathered, tattered look of this old crazy quilt. It has character. It really is a classic piece with all the black pieces and the hand-stitched motifs. The only thing not classic about it is that it is made in a typical "sane" quilt style in some ways, with pieces the same shape used to build the traditional patterns of blocks. The stars are comprised of many bits and pieces of cloth sewn together and then cut into diamonds. So there is more structure and planning to this crazy quilt than I've seen in others. Usually crazy quilts are made up of all different shapes and sizes of fabric pieces. But that's OK. No one would look at this and think sane anyway. It screams crazy. 
Here are some detailed shots:


One of my favorite parts about these antique crazies is the stitching. The stitching always outlasts everything else. The fabric may wither, fade and fall off but the stitching remains. It's probably no surprise, either, that the silk threads in this still look gorgeous, shiny and strong, while a number of the cotton threads are showing wear. I find this a good lesson in which kind of thread to invest in the future.

The names, though, are what really get me. 


I can't help but think about my friend, Judi McGill, who passed away almost three years ago now. Judi loved real quilts made by real people who used them on beds and proudly displayed them. This one would have been right up her alley. I have had so many projects over these three years I would have loved to share with her. An avid quilter, spinner and fan of all things textile, I know she would have drooled profusely over this antique work of art. I can picture us chatting away, pouring over stitching details, admiring threads, reading names, and sharing a cup of tea as we pondered who these people were. If these really were locals I'm sure Judi would have had the resources to find out the story behind the quilt. Judi's death still pains me, more than I would have thought imaginable. She was a real friend, the kind of person I could talk to about a lot more than just quilts and sewing. I still miss her. Like crazy.