(Note: I reference reverse chain stitch in the tutorial. Click the link for a video.)
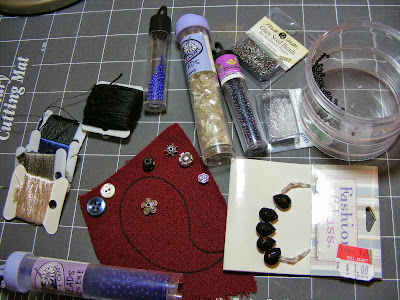
Supplies needed:
Paisley pattern
4-5 inch square of heavy fabric - velvet, velveteen or other thick fabric works well
Stitch witchery, wonder under or heat-n-bond webbing or fusible interfacing
Perle cotton size 5 or 8, rayon and silk embroidery threads in complimentary colors
Variety of seed and bugle beads to compliment your fabric
Center focal bead or silk ribbon that compliments your fabric
Beading thread
Glue
Construction time: About 8 hours depending on the level of detail and complexity of stitches.
Directions:
Apply fusible webbing or fusible interfacing to the back of your fabric. A heavy fabric provides a good base for building the paisley, and the webbing will help keep your fabric from unravelling. Some fabric color will show around your beading and stitchwork, but not much. Velvets and velveteens make a paisley look richer.
Print out the paisley patterns in appropriate sizes. Cut out a paisley.
You can trace the paper paisley onto card stock or the side of an empty tissue or cereal box and cut out for a more stable pattern. The large paisley shown in the construction photos is approximately 3" long.
Trace the paisley pattern onto the front of the fabric. Remove web backing, if appropriate.
Choose a variety of threads, seed beads and accent beads for your paisley in complementary colors. You won't use everything you bring out, but with a selection you will be able to pick and choose what looks best. If you know how to tat or have some tatted pieces available, those work well for a central focal point. Other centers can be made with silk ribbon embroidery, a small stitched motif or an ornate bead. Decorative buttons might also work, but if the button has a shank you will have to make a small hole in the fabric so the shank will drop below the surface. Otherwise, your button will be wobbly and sit on top of the fabric. You could also try a piece of felt under the button if you didn't want to make a hole.
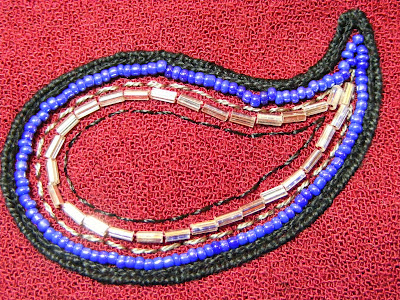
Stitch the border line of your paisley using reverse chain stitch or heavy chain/braid stitch. A medium weight perle cotton works well in size 5 or 8. This edge stitching creates a firm frame for your paisley. I think I used a thick silk fiber thread for this outline
Here's where you will alternate beads and stitching. Add a line of seed or other beads inside the chain stitching. Then add a line of backstitching. Rayons and silks work well for the embroidery, as they add a nice sheen and stand out from the fabric.
Continue adding thread and beads as space allows. A 2" long paisley will hold 3 to 6 rows of stitching and beads, depending on what is intended for the center. The constructed paisley shown has a total of 6 inner rows of beading and stitching when finished.
Tip: Keep your threads tidy on the paisley's back to keep the fusible webbing exposed and to minimize bulk.
You should have by now decided what you wish to place in the center of your paisley. A large bead or bead cap works well. A flat button or SRE works well, too. A center of silk ribbon roses in descending order (a spiderweb rose followed by graduated French knots) can be seen below.
Once your center is completed, cut out your paisley using sharp scissors. Cut carefully around the outside line of stitching and avoid clipping any of your edging stitches or your outline stitching will unravel. Carefully trim off any excess fabric.
Here is the finished paisley. I made this one for my husband to adorn his tan messenger bag. I think it will look nice. I chose more "manly" colors, since it was for him, including making a center thistle instead of a frilly flower. He loves it, so I'm happy.
If you have used fusible webbing you should be able to largely fuse your paisley onto fabric and hand stitch around the edge to secure it. Otherwise, stitch or glue your paisley wherever desired. You can also attach a clip on the back and use it as a hair clip.
Here are some other paisleys I've done.
This is a nice one. Very ornate. I did the tatted flower in the center. The outside edge is done in cast-on stitch and bugle beads. Lots of colonial knots, too.
This pretty paisley went on a CQ round robin block several years ago. The center is filled with silk ribbon French knot roses. I got to show CQ guru Judith Baker Montano how to make these lovelies during one of her workshops, so that was a little thrill.
This has always been one of my favorites. That variegated thread is Sassa Lynn, one of my favorite brands of embroidery thread.
This one always reminds me of blueberries for some reason. In a lot of these I used buttonhole stitch for my first outlining stitch. Then I went back and added beads and bullion stitches to the outside edge for a nice scallop look finish. The inside flowers are also bullion stitch.
Fresh water pearls look really nice on these.
I hope you enjoyed the tutorial and find it useful. Feel free to comment and add links so we can see your finished paisley.


No comments:
Post a Comment